


Photographers use mannequins to make both two-dimensional and three-dimensional pictures of different clothes.
On the other hand, images of mannequins can’t be used in online e-commerce product stores without extra editing. The designers use a variety of different Photoshop tools to take the mannequin out of these clothes.
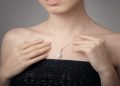
This way, called the “ghost mannequin” method, makes it easy to take the mannequins out of the scene.
Step 1: Plan and prepare ahead of time
First and most important, you need to plan carefully. If you don’t plan how you want your photos to look ahead of time, they won’t look good.
You should think carefully about how you are going to decorate your clothes. Before you can move on with the process, you have to iron the goods if the fabric is wrinkled.
There’s also the chance that there’s a tag you don’t want to show. In this situation, the tape is a good way to keep things secret. Pins and clips are two more things that can be used to define the shape.
Have you researched each of these on its own?
You have reached the point where you can move on to the next level.
Step 2: Choose a background that doesn’t have much going on
Choose a background that doesn’t have any stains or marks on it. Usually, people choose a white background for product photography because it’s the most common color.
If you need to take pictures of clothes without a mannequin, you can also use a pastel background. This would be a different choice.
Because of this, you can play around with the color difference between your foundation and your clothes.
And later you can use photoshop image masking tools to edit these images if you need.
Step 3: you’ll need to get your photography gear ready
In the second step, you need to pay attention to the photography equipment you have.
You shouldn’t depend on your camera alone all the time.
You will also need to get some basic things ready, like a tripod, a light source, a background, boxes, and anything else that might be useful.
Keep in mind that you shouldn’t put anything in the frame that might confuse the viewers. Remembering this is a very essential point to keep in mind.
Step 4: Get your clothes ready for the picture
This is the step that, in the end, can decide how good the product is.
You need to make sure that the person or thing being photographed doesn’t have any flaws or stains.
You can keep the sleeve folded if you think that looks better.
You’re also free to lay the piece of clothing out flat in any way you want.
To keep this from happening, you could try holding the shape you want with clear tape.
Step 5: Set up a place to take pictures
In the fourth step, you need to make sure that the photo studio is set up correctly.
A good place to start is by putting together a background. Before you walked on the floor, you should have cleaned it.
You must pay attention to how the space looks on the inside. The way you set up the lights is the most important thing you can do.
This is the most important thing of all.
Step 6: Check out your camera’s menus and settings
You need to double-check how your camera is set up.
If you don’t have a mannequin and want to take a better picture of your clothes, the first thing you need to do is change the aperture, shutter speed, and ISO sensitivity of your camera.
Photos that were taken without a model.
Step 7: Time to shoot photos
The last step in the process has now been reached.
You have to put your camera on a tripod, and you have to put the piece of clothing on a table or the ground.
Place your light source in an area that doesn’t look very bright. The picture should show the true color of the clothes you are wearing.
If the color of artificial light doesn’t look good on a dress, move it closer to a window and take pictures of it using natural light instead.
At this point, there is no reason to keep any parts of the frame that aren’t needed.


